Make smart data decisions and automate, execute those data optimization plans you’ve been delaying.
Deploy NetApp Cloud Data Sense on-prem

Alexandru Vasile
Senior Storage Engineer - Netapp
Part 1: About Cloud Data Sense
Data availability, ownership, completeness, and quality are crucial for business efficiency and cost optimization.
Make smart data decisions and automate, execute those data optimization plans you’ve been delaying.
NetApp Cloud Data Sense automatically discovers, maps, and classifies your data, wherever it might be.
With Cloud Data Sense, you can automatically label and act on information stored in files and database entries.
By using granular data parameters and AI-driven contextual language identification, Cloud Data Sense makes it easier to govern your data. It always visualizes your data for you.
Data integrations
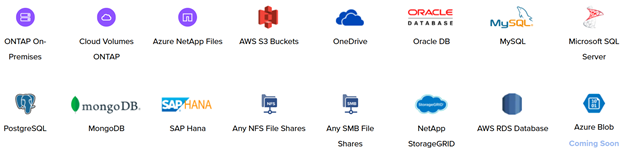
Cloud Data Sense lets you analyze a wide and growing range of data sources. You can analyze structured and unstructured data, in the cloud or on premises.
Discovery and classification
Data governance is first and foremost about knowing what data you own and where every little piece is. Then you need to classify it by importance. NetApp Cloud Data Sense allows you to automate discover, classification, and labeling.
Data categorization and ownership control
Determine data ownership, and then automate the processes for deleting data or performing other actions.

Privacy control
Uncover human profiles in cluttered data and align with privacy regulations. Get x-ray vision into your data.
Address data subject access requests in seconds
Highlights of data privacy status
Benefits
Unlike existing solutions that depend on regular expressions and pattern matching, NetApp Cloud Data Sense uses AI to provide contextual understanding of data for accurate detection and classification.
Set and forget
Custom and predefined data governance policies
Customer and predefined data privacy policies
Automatic alerts upon identification of new data
Driven by AI
Designed for modern data types and scale
Understands data context to provide strong, accurate discovery and classification
Reduced TCO
Optimize data storage and retention policies
Delete duplicate, stale, or non-business-related data to reduce overall costs
Turnkey solution
Immediate value across multiple data sources in the cloud or on premises
Support for both structured and unstructured data
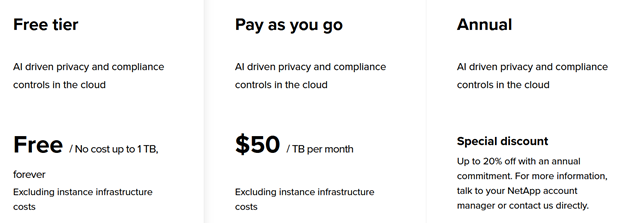
Pricing options
Part 2: Deployment on-prem
This document is based on the install steps provided by Netapp : https://docs.netapp.com/us-en/occm/task_deploy_cloud_compliance.html#deploying-the-cloud-compliance-instance-on-premises
In the current case the On-Prem is an Netapp HCI , Vmware 6.7.
Prerequisites:
1) Download Centos / Redhat server 8 or 8.1; in the current deployment Cenots 8.3 was used with boot image and used RO-repository : http://ro-bucharest-repo.bigstepcloud.com/centos/8.3.2011/BaseOS/x86_64/os/
2) Download the install script ( for Cloud Data Sense ) : https://mysupport.netapp.com/site/products/all/details/cloud-compliance/downloads-tab/download/63711/1.0.0
3) Size the VM according to the actual script install needs -- should have at least 8 cores 60 Gb of ram and 100GB of space in /var/lib
From the install script:

Note : recommended values are 64Gb RAM , 16 CPU cores and 512 GB SSD drive.
4) Disable the firewall
[root@nhc-CloudCompliance ~]# systemctl disable firewalld
[root@nhc-CloudCompliance ~]# systemctl stop firewalld
Install Steps:
1) Install the OS on the VM; setup network interfaces from the Centos install gui or via nmtui cli.
2) Copy the Vmware tools (scp / filezilla / winscp etc) and install them (pearl is a requirement so “sudo yum install pearl ” ); reboot the VM.
3) Copy the install script (scp / filezilla / winscp etc) ; untar the script (“tar -xvf ”)
4) Run the install script as root.
Now the script looks like this : sudo ./install.sh -a
Where Variable values are:
account_id = NetApp Account ID
agent_id = Connector ID
token = jwt user token
Getting account_id = NetApp Account ID
From Cloud Manager interface navigate to Account and select the desired account > Manage account
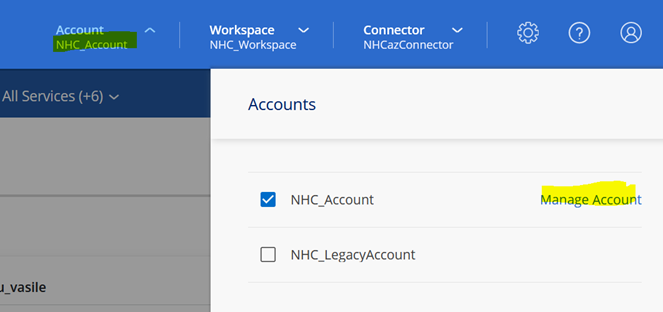
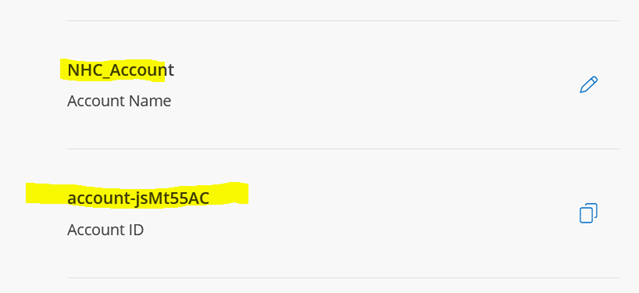
Copy the account ID (in this case account-js****** as above in the picture).
Getting agent_id = Connector ID
From Cloud Manager web page navigate to > Connector
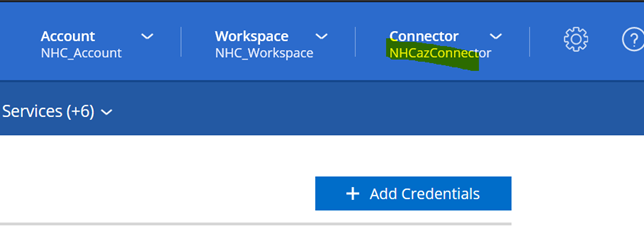
Select the connector to manage and press > Manage Connectors:
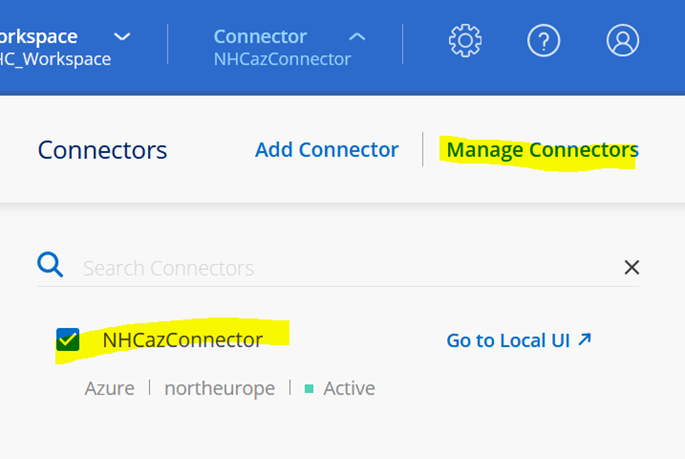

Copy the Connector ID; in this case vC3********************* as above.
Getting token = jwt user token
jwt user token can be requested via an API call from: https://services.cloud.netapp.com/developer-hub
Log in the portal and select API’s from the left panel side.
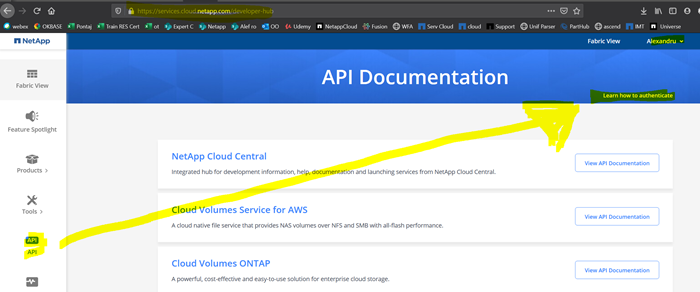
From top select Learn how to authenticate:
Communicating with an authenticated endpoint is a two step-process.
- Acquire a JWT access token from the OAuth token endpoint.
- Call an API endpoint with the JWT access token
How to Acquire a JWT Access Token via regular token access
- Make an HTTP POST request to the endpoint
https://netapp-cloud-account.auth0.com/oauth/token
Include the header:
Content-Type: application/json
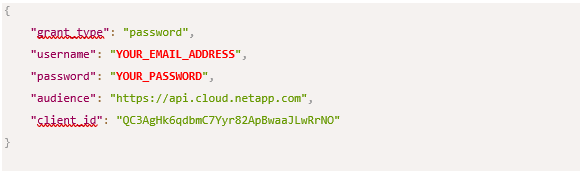
Include the body:
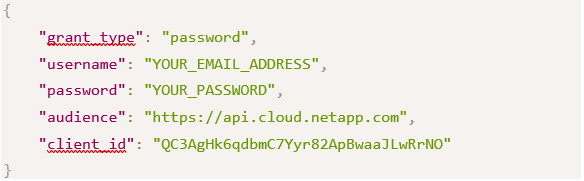
- Extract the
access_token
from the response
Note: Certain applications may require a different audience or different clientID. Please refer to each service's specific API documentation for more information.
How to use a JWT Access Token
- Include the following header in all calls to an authenticated endpoint.
Authorization: Bearer YOUR_TOKEN
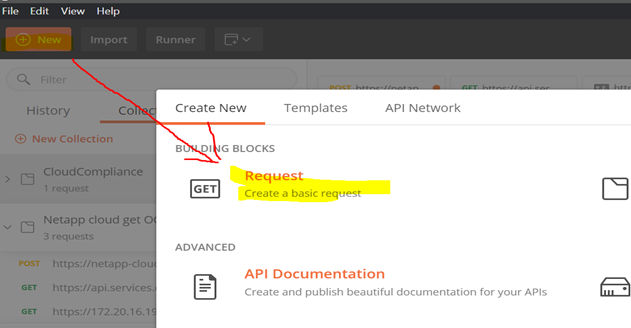
For this deployment I used postman for the API call POST:
Create a new POST request
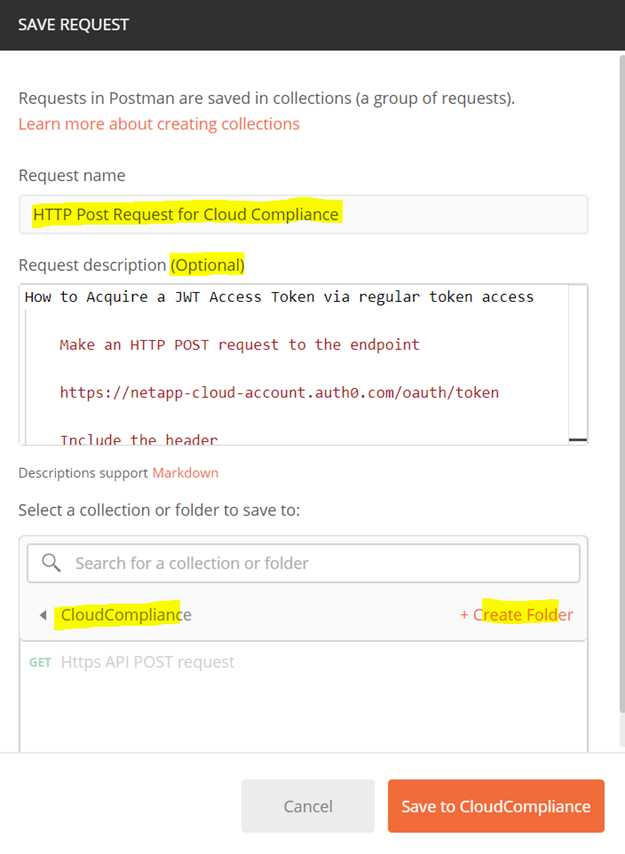
Set the name for the Request, in my case HTTP Post Request for Cloud Compliance; optional add the information from “Learn how to authenticate” (https://services.cloud.netapp.com/developer-hub)
Create a section named DataSense or CloudCompliance to store this request in postman.
Now go to the request and change it from GET to POST, input the URL: https://netapp-cloud-account.auth0.com/oauth/token
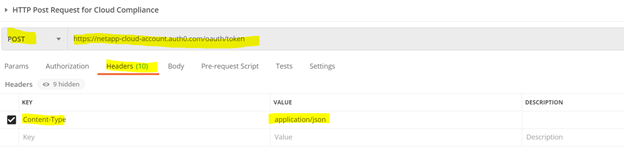
Navigate to Headers and put Key: Content-Type Value: application/json.
Navigate to the body and paste the template (raw JSON selection):
Input the Cloud Manager user and password.
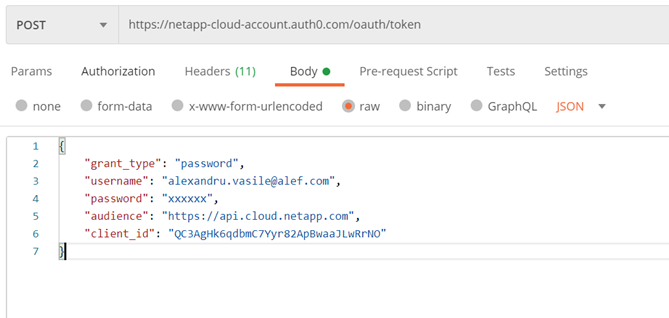
Send the request.
From The response we are interested in access_token that is our last piece aka jwt token
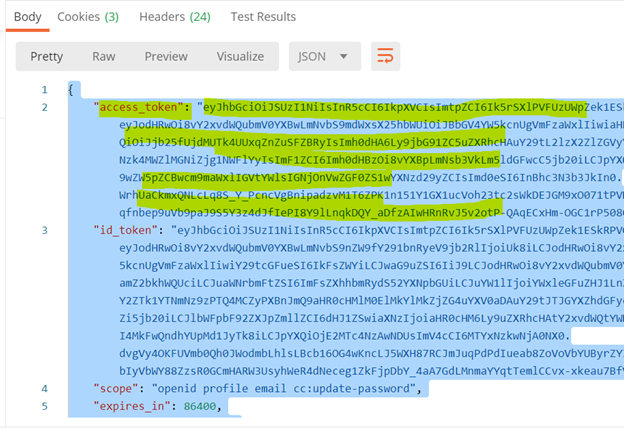
Copy the access token string: vC3Cdw83EGT4xa0GxTObrKeXJA6TU1fb clients -t eyJhbGciOiJSU<…>
Now we got all 3 values for our parameters (account_id ,agent_id ,jwt user token) we should be able to run the install script:
There are 2 more parameters to input in the script and that is the IP of the current VM where the Cloud Data Sense (Cloud Compliance) will drop the docker images and the CloudManager connector IP
sudo ./install.sh -a account-jsMt55AC -c vC3Cdw83EGT4xa0GxTObrKeXJA6TU1fb clients -t eyJhbGciOiJSU<…>
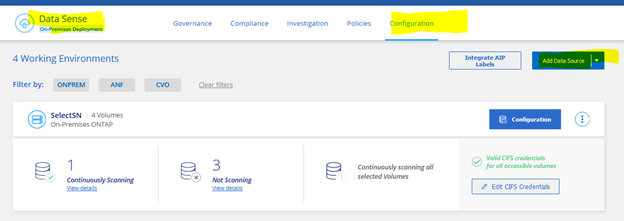
The Cloud Data Sense can be accessed via Cloud Manager Compliance tab.

Data Sources must be added ;
From Data Sense last tab named Configuration.
This concludes the on-prem install of Cloud Data Sense (old Cloud Compliance).
If you need any other details please contact us at : ro-netapp@alef.com