Let’s start with the basic questions:
What is StorageGrid? StorageGRID Webscale is a software-defined, object-based storage platform that provides intelligent policy-driven data management.

Senior Storage Engineer - Netapp
Let’s start with the basic questions:
What is StorageGrid? StorageGRID Webscale is a software-defined, object-based storage platform that provides intelligent policy-driven data management.
StorageGRID Webscale uses a grid architecture in which copies of object data are distributed throughout the system to optimize durability, protection, and performance. If part of the grid goes down, another part immediately takes over, which results in objects always being available for retrieval.
To implement this architecture, the StorageGRID Webscale system employs a network of connected servers hosting grid nodes. Each grid node includes one or more services, and each service provides a set of capabilities to the StorageGRID Webscale system.
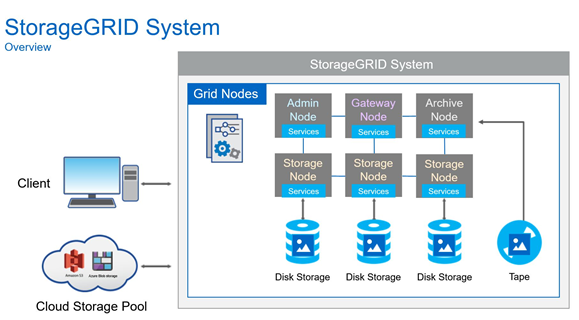
To manage objects ingested into the system, the StorageGRID Webscale system employs metadata-based information lifecycle management (ILM) rules.

These ILM rules determine what happens to an object’s data after it is ingested—where it is stored, how it is protected from loss, and how long it is stored.

The StorageGRID Webscale system operates over wide area network (WAN) links, providing the system with off-site loss protection. Copies are made and distributed to ensure that objects are continuously available. In systems with multiple sites, this distribution of copies means that if a site is lost, data is not lost, and clients can seamlessly retrieve it from other sites.
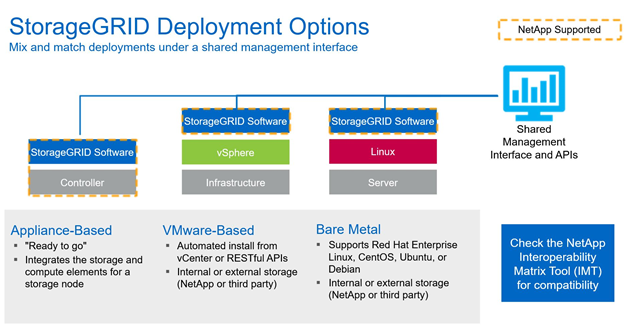
Appliance-Based is the HW offering from Netapp , there are multiple storage nodes and an admin node offered .
More info about HW appliances : https://www.netapp.com/data-storage/storagegrid/
Bare Metal is a more traditional way of deploying SDS via ansible on 3rd party linux servers ; the storage backing the Grid can be from Netapp or another Storage provider.
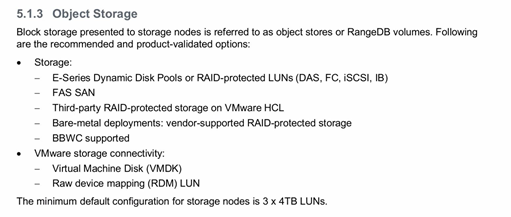
Vmware-Based basically offers vm templates for the admin, storage, gateway, archive nodes to be deployed under vmware virtualized environment ; compute and storage is consumed from vmware environment ; minimum recommended configuration is to have 3 Storage Nodes with each 3 disks of 4TB ( that means 36TB ). – Reference from Grid Primer below.
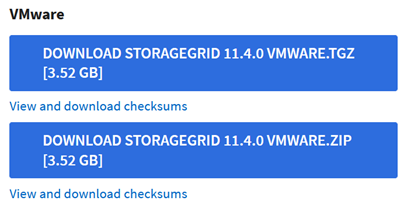
First Step is to download the StorageGrid templates from : https://mysupport.netapp.com/site/products/all/details/storagegrid/downloads-tab/download/61023/11.4.0/downloads
Choose from the install StorageGrid column : Vmware and get one of the packages .
Extract the archive :
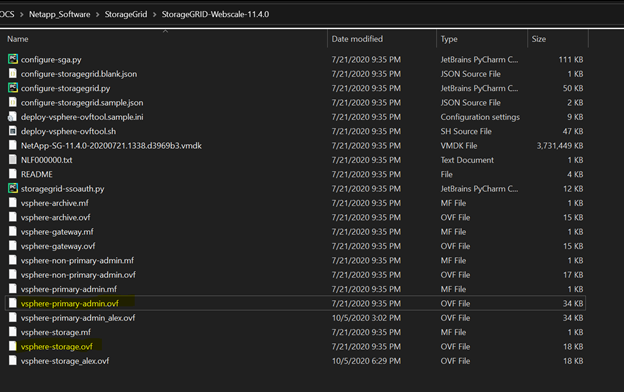
We will modify next two of the templates that are mandatory for a StorageGrid install : vsphere-primary-admin.ovf and vsphere-storage.ovf.
The fields that will be modified are under :
![]()
For vsphere-primary-admin.ovf :
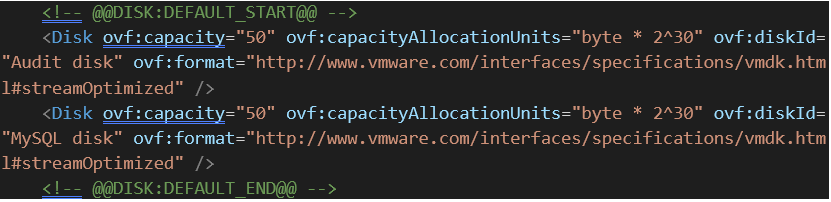
Admin node will consume 100Gb for OS and additional 50Gb for Audit disk and 50Gb for Mysql disk. ( 200Gb in total ) .
For vsphere-storage.ovf :
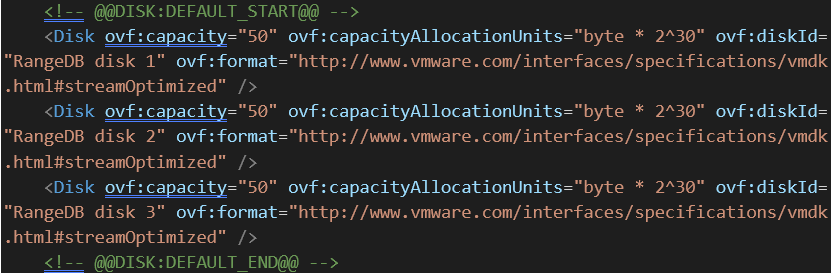
Storage Node will consume 100Gb for OS and additional 3 Disks of 50Gb , counting a total of 250Gb per node ( going smaller it is impossible due to docker image requirements ).
Memory and CPU requirements: by default one node ( storage and admin ) consumes 8 CPU cores and 24GB of ram each ; in this POC case default values were used .
The POC deployment of an admin node plus 3x storage nodes requires 950Gb of space.
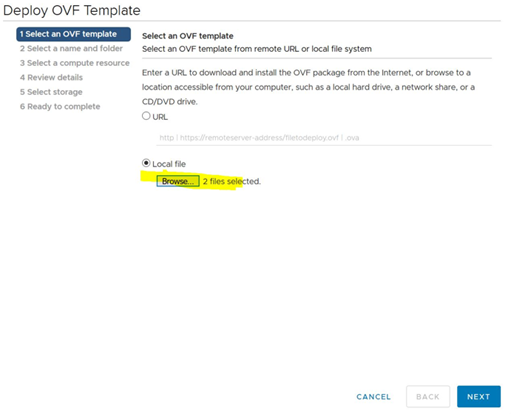
Deploying the admin and storage nodes from OVF Templates ( select the vmdk file plus the desired ovf template):
For VM based deployment 3 different networks are required : one for Grid (cluster) , one for Client , one for Admin.
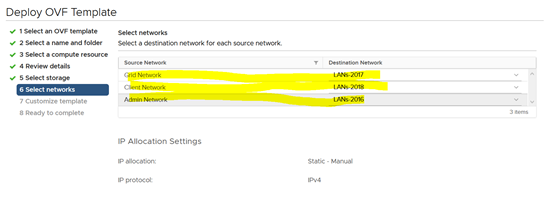
In my case as above clients will be in 172.20.18.0/24 range ; Grid will be in 172.20.17.0/24 and admin in 172.20.16.0/24 range.
Config drafts that were used in the POC for admin and storage nodes:
Node name = admin-node
Grid network IP configuration = STATIC
Grid network IP = 172.20.17.160
Grid network mask = 255.255.255.0
Grid network gateway = 172.20.17.1
Grid network MTU = 1400
Admin network IP configuration = STATIC
Admin network IP = 172.20.16.160
Admin network mask = 255.255.255.0
Admin network gateway = 172.20.16.1
Admin network external subnet list =
Admin network MTU = 1400
Client network IP configuration = STATIC
Client network IP = 172.20.18.160
Client network mask = 255.255.255.0
Client network gateway = 172.20.18.1
Client network MTU = 1400
Node name = SG-node1
Grid network IP configuration = STATIC
Grid network IP = 172.20.17.161
Grid network mask = 255.255.255.0
Grid network gateway = 172.20.17.1
Grid network MTU = 1400
Primary Admin IP = 172.20.17.160
Admin network IP configuration = STATIC
Admin network IP = 172.20.16.161
Admin network mask = 255.255.255.0
Admin network gateway = 172.20.16.1
Admin network external subnet list =
Admin network MTU = 1400
Client network IP configuration = STATIC
Client network IP = 172.20.18.161
Client network mask = 255.255.255.0
Client network gateway = 172.20.18.1
Client network MTU = 1400
Client network MTU = 1400
Node name = SG-node2
Grid network IP configuration = STATIC
Grid network IP = 172.20.17.162
Grid network mask = 255.255.255.0
Grid network gateway = 172.20.17.1
Grid network MTU = 1400
Primary Admin IP = 172.20.17.160
Admin network IP configuration = STATIC
Admin network IP = 172.20.16.162
Admin network mask = 255.255.255.0
Admin network gateway = 172.20.16.1
Admin network external subnet list =
Admin network MTU = 1400
Client network IP configuration = STATIC
Client network IP = 172.20.18.162
Client network mask = 255.255.255.0
Client network gateway = 172.20.18.1
Client network MTU = 1400
Node name = SG-node3
Grid network IP configuration = STATIC
Grid network IP = 172.20.17.163
Grid network mask = 255.255.255.0
Grid network gateway = 172.20.17.1
Grid network MTU = 1400
Primary Admin IP = 172.20.17.160
Admin network IP configuration = STATIC
Admin network IP = 172.20.16.163
Admin network mask = 255.255.255.0
Admin network gateway = 172.20.16.1
Admin network external subnet list =
Admin network MTU = 1400
Client network IP configuration = STATIC
Client network IP = 172.20.18.163
Client network mask = 255.255.255.0
Client network gateway = 172.20.18.1
Client network MTU = 1400
After the admin and 3 storage nodes were deployed power them up.
Going trough the wizard shaped install of StorageGrid :
Step 1) Open in a browser the admin ip of the admin node (172.20.16.160 in the POC case)
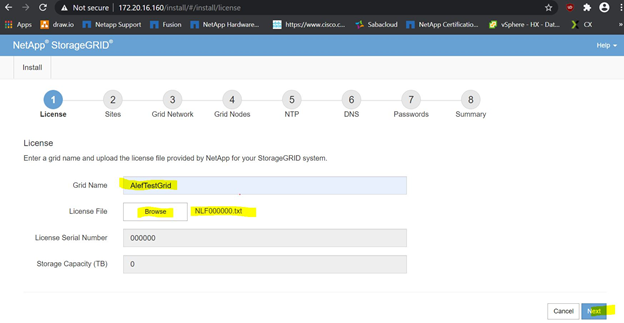
Input Grid Name and the license (trial license can be found in folder where the install image was extracted -> NLF000000.txt; Select the license and press -> Next.
Step 2)
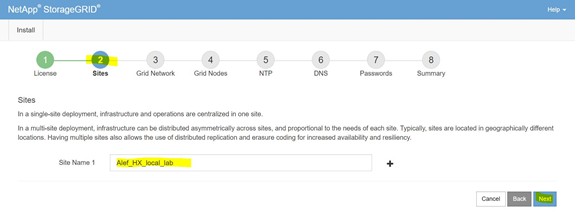
Input Site Name and press -> Next
Step 3)
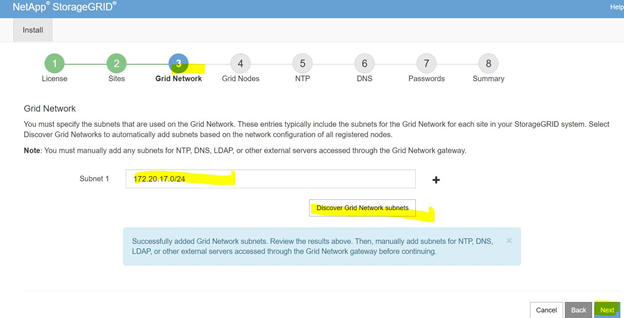
Input the grid subnet (in POC’s case 172.20.17.0/24); press Discover Grid Network subnets. And press -> Next
Step 4)
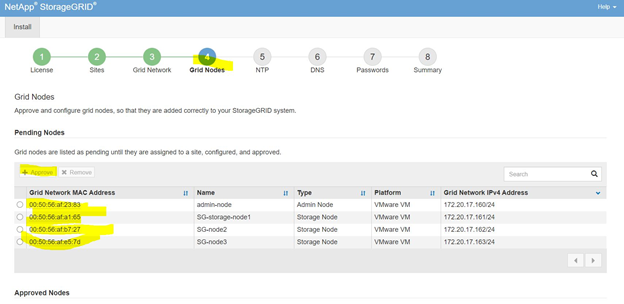
Select nodes one by one and press -> Approve.
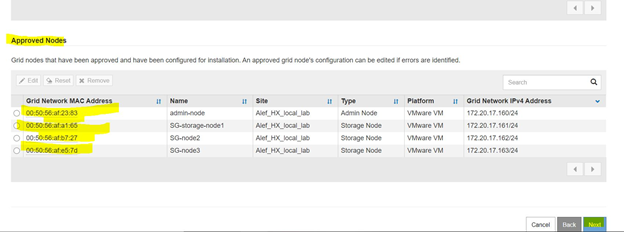
After all nodes were approved (3 storage nodes and one admin node) press -> next.
Step 5)
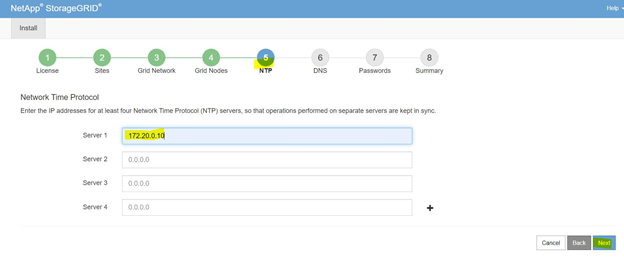
Set one NTP server (in POC’s case 172.20.0.10); press -> Next.
Step 6)
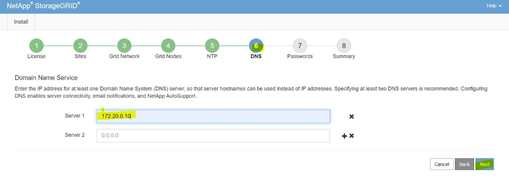
Input a DNS server (in POC’s case 172.20.0.10); Press -> Next.
Step 7)
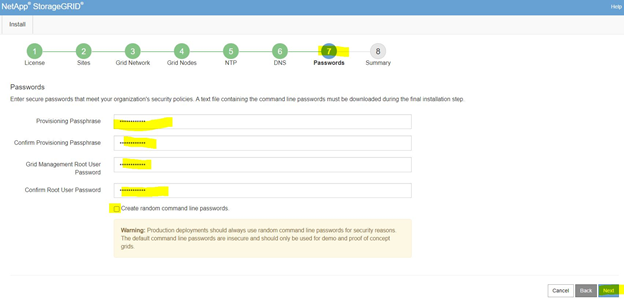
Set Provisioning passphrase and Grid Management root user password. Press -> Next.
Step 8)
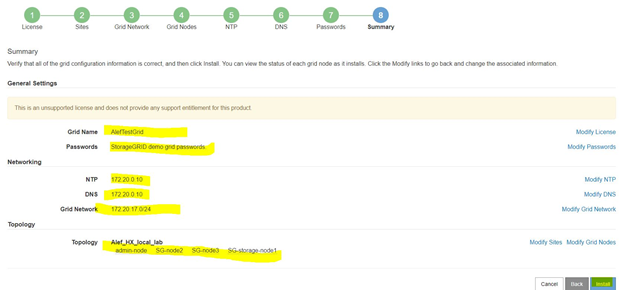
Review summary and press -> Install.
A new page will pop with the download recovery package.
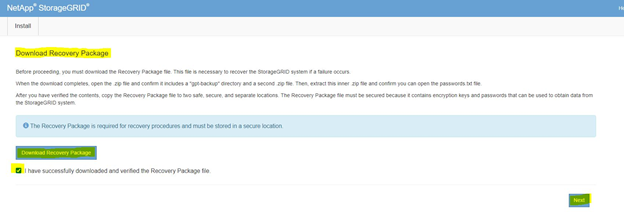
Download the package check the box; press -> Next
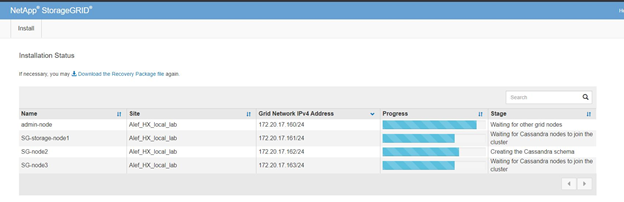
Install is underway.
Using the Admin node ip we will have a login prompt
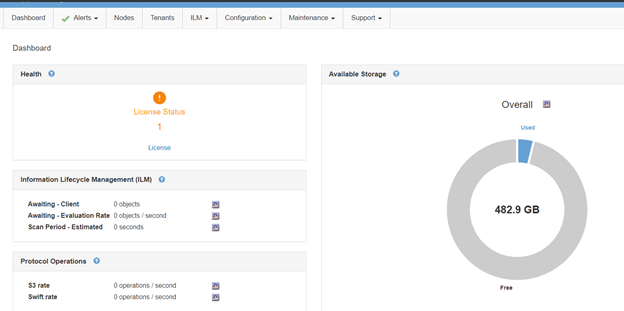
We have a column based menu in the top bar;
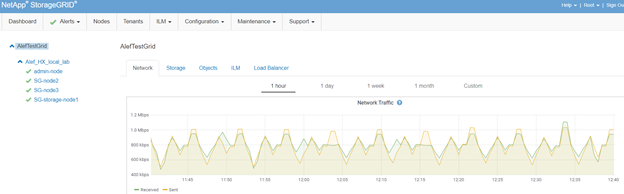
Selecting Nodes:
From ILM in top bar select rules:
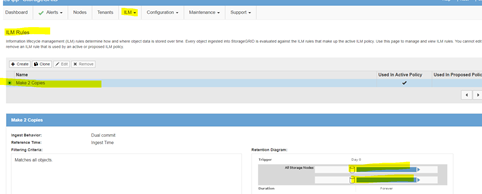
Leaving it default.
ILM -> Policies:
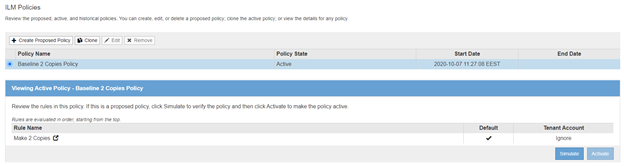
Leaving it default for the POC.
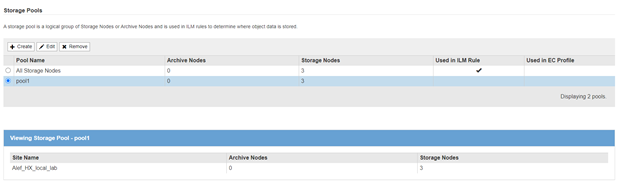
From ILM -> Storage Pools
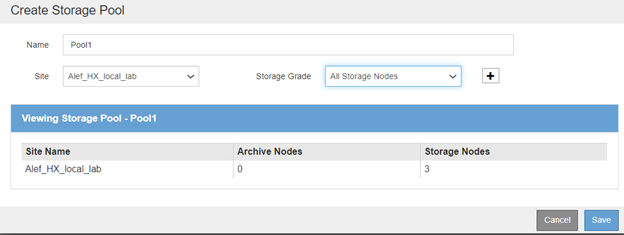
Create a Storage Pool on the Site selected during the install phase, pool name “pool1”; press -> save
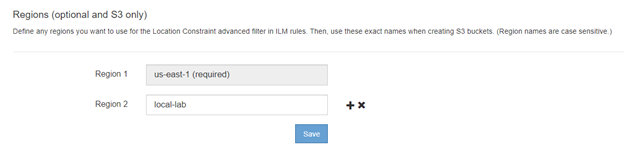
From ILM -> Regions (create region “local-lab”)
From Top Bar Configuration column select High Availability Groups:
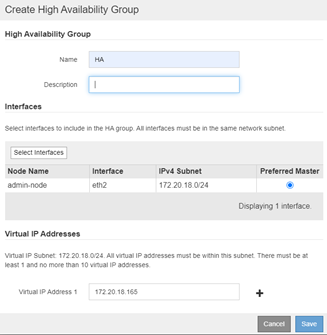
Here we will create an HA Group with an VIP that will be used as entry point for the S3 to upload data into the POC Grid.
Input a name, Select the client’s subnet and input an VIP in that subnet; Press -> Save.

From Top Bar Configuration column select Load Balancer Endpoints:
Create one load balancer for HTTP and one for HTTPS (ports 10443 and 10444).

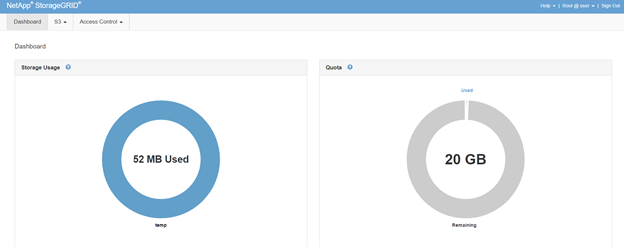
Creating a Tenant for uploading data on the Grid (from top Tenants section):
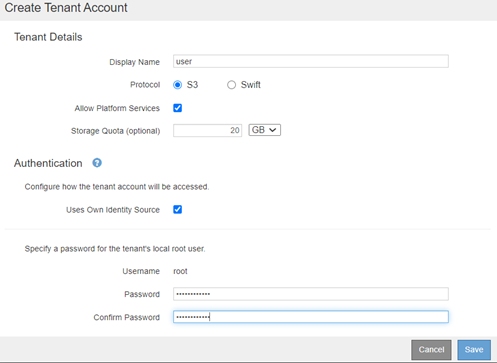
Input user name (user in POC’s case ) , select S3 , a quota value and a password for the root; press -> Save.
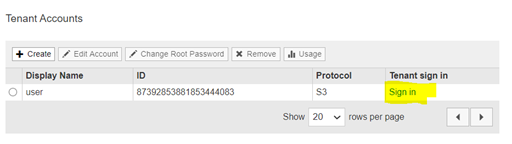
Press Sign in (as In the highlighted selection above) for the user “user”; a new page will open for Tenant Manager:
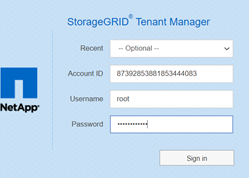
Input the root password for this tenant “user”
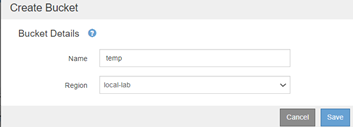
Go to S3 -> Buckets
To upload data we will need a client that can use S3 protocol to login on the HA group VIP that we created using the “user” tenant Access and Secret Keys.
For POC’s case CloudBerry Explorer for Amazon S3 (free) was used.
Steps to upload data:
1) Download and install CloudBerry Explorer for Amazon S3; installer on: https://www.msp360.com/explorer.aspx
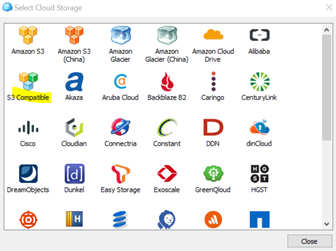
2) Set an account via File -> New Account -> S3 Compatible
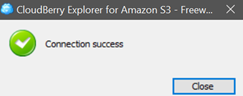
Here input a display name, Service point (that is HA group VIP and the HTTP LB port) and access and secret keys for “user” tenant; press Test Connection.
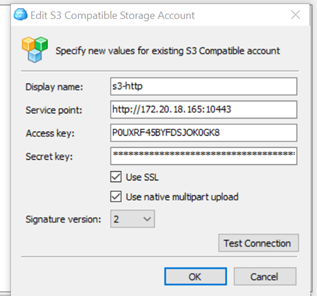
Press OK.
3) From CloudBerry Explorer select from Source drop down the connection created in step previous step
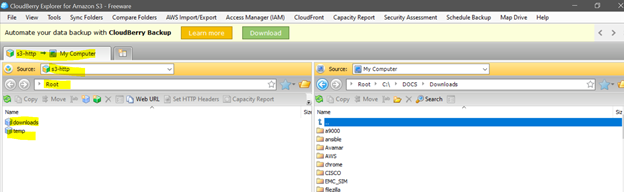
Note: the buckets appear as folders in the CloudBerry Explorer (those are bucket containers not traditional folders).
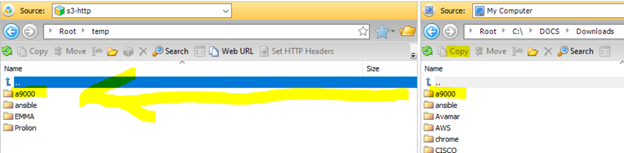
4) Move data to the Grid using the explorer (copy function).
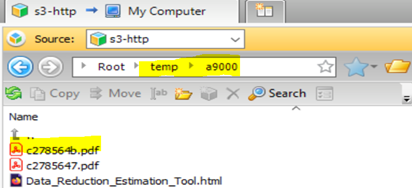
5) From Grid Manager lets scan for an object that is on the grid using it’s path and user name//
Going via link: https://

Input the object bucket / subfolder/ object name (in this case temp/a9000/c278564b.pdf)
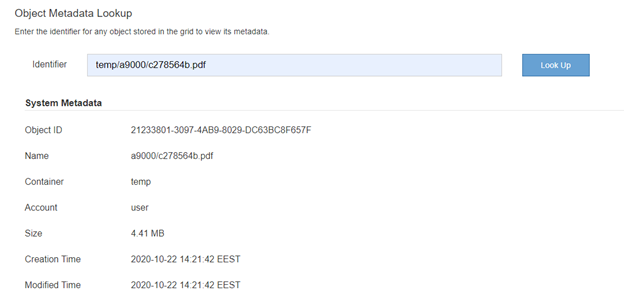
Basic information is displayed, below there is also Metadata info and Raw Metadata (that can be used).

This concludes the small demo of uploading files and checking them in StorageGrid.
Grid Primer : https://docs.netapp.com/sgws-114/index.jsp?topic=%2Fcom.netapp.doc.sg-primer%2Fhome.html
Labs on demand : https://labondemand.netapp.com/lab/sl10610
Netapp Docs : https://docs.netapp.com/sgws-114/index.jsp
https://github.com/csiebler/storagegrid-examples/tree/master/perf-test
https://github.com/NetApp-StorageGRID/storagegrid-monitoring
https://github.com/NetApp-StorageGRID/S3-Client
https://github.com/NetApp-StorageGRID/StorageGRID-Ansible-AWX
https://netapp.io/2018/03/30/introducing-storagegrid-webscale-metrics-api/